A Comprehensive Guide to Changing the Sky in Motion Ninja
In the world of mobile video editing, Motion Ninja stands out as a powerful and versatile application. Designed for both professionals and enthusiasts, it offers a plethora of features that cater to various editing needs. One of its standout capabilities is the “Magic Sky Replacement” feature, which allows users to seamlessly change the sky in their videos, adding a cinematic touch with minimal effort.techleezzMotionNinja Apk Download+1Tech Tamil Ifos+1List Apps+2Apple+2MotionNinja Apk Download+2
Table of Contents
1. Introduction to Motion Ninja
Motion Ninja is a professional-grade video editing application available for both Android and iOS devices. It offers a suite of advanced features, including keyframe animation, chroma keying (green screen), cinematic effects, and multi-layer editing. These tools empower users to create high-quality videos directly from their smartphones or tablets.Tech Tamil Ifos+2techleezz+2MotionNinja Apk Download+2
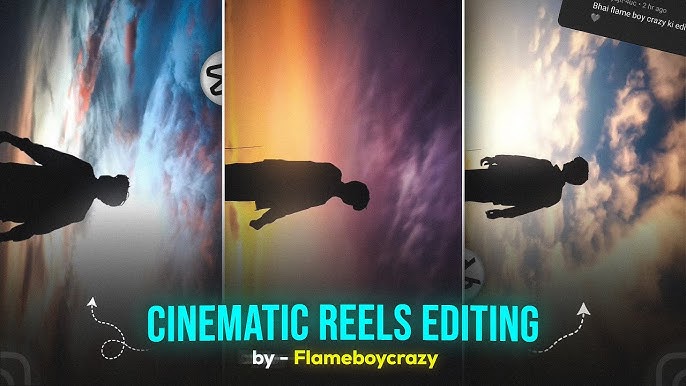
2. Understanding the Magic Sky Replacement Feature
One of the most captivating features of Motion Ninja is its “Magic Sky Replacement.” This tool enables users to replace the existing sky in their videos with a variety of stunning skies, such as sunsets, starry nights, or even cosmic vistas. The feature is designed to be intuitive, allowing for quick edits without compromising on quality.Liteapks+5iFreeware+5Apple+5
3. Preparing Your Video for Sky Replacement
Before diving into the sky replacement process, it’s essential to prepare your video:
-
Select Appropriate Footage: Choose a video where the sky is prominently visible and not obscured by objects.
-
Ensure Proper Lighting: Videos shot during daylight with clear skies yield the best results when replacing the sky.
-
Stabilize Your Footage: Use a tripod or stabilize your camera to avoid shaky footage, ensuring a smooth editing experience.
4. Step-by-Step Guide to Changing the Sky
a. Importing Your Video
-
Open Motion Ninja: Launch the Motion Ninja app on your device.
-
Create a New Project: Tap on the “New Project” button.
-
Import Media: Select the video from your device’s gallery that you wish to edit.iFreeware+3techleezz+3Liteapks+3
b. Accessing the Magic Sky Replacement Tool
-
Select the Video Layer: Tap on the video layer in the timeline where you want to apply the sky replacement.
-
Open Effects Menu: Tap on the “Effects” icon, usually represented by a magic wand or star.
-
Navigate to Sky Replacement: In the effects library, scroll to find the “Magic Sky” effect.MotionNinja Apk Download+1APKMaza+1
c. Selecting a New Sky
-
Browse Sky Options: Motion Ninja offers a variety of pre-set skies, including sunsets, clouds, and starry skies.MotionNinja Apk Download+1Apple+1
-
Preview Skies: Tap on different sky options to preview how they look with your video.
-
Select Desired Sky: Once you find a suitable sky, tap on it to apply it to your video.
d. Adjusting the Sky Settings
-
Positioning: Use the positioning tools to align the new sky with your video’s horizon.
-
Scaling: Adjust the scale to ensure the sky covers the entire frame without distortion.
-
Blending: Modify the blending settings to make the transition between the original footage and the new sky seamless.
-
Color Correction: Fine-tune the colors to match the lighting and mood of your video.
e. Previewing and Finalizing
-
Preview Your Edit: Tap the play button to watch a preview of your video with the new sky.
-
Make Necessary Adjustments: If needed, go back and tweak the settings for optimal results.
-
Export Your Video: Once satisfied, tap on the “Export” button.
-
Choose Export Settings: Select the desired resolution, frame rate, and format for your video.Tech Tamil Ifos
-
Save and Share: After exporting, your video is ready to be shared on platforms like YouTube, TikTok, or Instagram.Apple+2Apple+2Tech Tamil Ifos+2
5. Tips for Achieving Realistic Sky Replacements
-
Consistency in Lighting: Ensure that the lighting of the new sky matches the lighting conditions of your original footage.
-
Use High-Quality Sky Images: Higher resolution skies result in sharper and more realistic visuals.
-
Pay Attention to Shadows: Adjust shadows and highlights to maintain consistency between the foreground and the new sky.
-
Avoid Overused Skies: Select unique skies to make your video stand out and feel authentic.
6. Advanced Techniques and Customizations
For users looking to delve deeper into video editing, Motion Ninja offers advanced tools:
-
Keyframe Animation: Animate various properties over time for dynamic effects.APKMaza
-
Chroma Keying: Combine multiple layers with green screen effects for complex compositions
How to Change the Sky in Your Videos with Kotion Ninja App (Complete Guide)
In today’s fast-paced digital world, video content is more competitive than ever. Whether you’re a content creator, filmmaker, influencer, or business owner, making your visuals stand out is crucial. One powerful way to elevate your video production is by replacing the sky in your footage — and thanks to the Kotion Ninja app, this is now easier than ever.
In this guide, we’ll show you how to change the sky in videos using Kotion Ninja, step-by-step, along with expert tips to ensure professional-looking results every time.
Why Change the Sky in a Video?
The sky in a video sets the tone, atmosphere, and mood of your scene. Replacing it opens up endless creative possibilities:
-
Fix bad weather: Replace dull, cloudy skies with clear blue or golden-hour skies.
-
Add cinematic effect: Create dreamy sunsets, starry nights, or fantasy skies.
-
Maintain continuity: Ensure consistent lighting and skies across multiple shots.
-
Boost engagement: More visually appealing videos attract more views and shares.
What is Kotion Ninja App?
Kotion Ninja is an AI-powered video editing app designed for creators of all skill levels. It offers a wide range of advanced editing tools — including sky replacement, background removal, filters, transitions, and effects — all packed in a user-friendly interface.
Available on both Android and iOS, Kotion Ninja lets you edit on-the-go without needing complex desktop software.
How to Replace the Sky in Videos Using Kotion Ninja (Step-by-Step)
Let’s dive into how to replace skies using the Kotion Ninja app:
Step 1: Download and Open Kotion Ninja
-
Visit the App Store or Google Play Store
-
Download Kotion Ninja Video Editor
-
Launch the app and sign in or register (optional but recommended for saving projects)
Step 2: Import Your Video
-
Tap “New Project”
-
Select the video clip you want to edit from your gallery
-
Load it into the timeline
Tip: Choose high-resolution videos for the best editing quality.
Step 3: Add a New Sky Background
-
Tap the “Layer” or “Overlay” option
-
Import your new sky image or sky video (make sure it matches the angle and lighting of your original footage)
-
Resize and position the sky so it fits perfectly in the background
Step 4: Apply Sky Removal Tool
Kotion Ninja’s AI automatically detects the sky in your footage.
-
Go to the AI Tools or Effects tab
-
Choose “Sky Replacement”
-
The app will scan the footage and remove the existing sky
-
Your new sky image will appear in place
Pro Tip: If needed, you can manually refine edges using the masking brush.
Step 5: Adjust Blending & Color Settings
-
Adjust the blending mode (try “Overlay” or “Soft Light” for natural looks)
-
Use Brightness, Contrast, Saturation, and Hue tools to match the sky with the original lighting
-
Use Feathering or Edge Smoothing to soften the transition between sky and landscape
Step 6: Preview and Export
-
Play your edited video to ensure everything looks seamless
-
Make final tweaks
-
Tap Export
-
Choose your desired resolution (up to 4K available)
-
Save or share directly to YouTube, Instagram, TikTok, or other platforms
Best Tips for Realistic Sky Replacement
To ensure your new sky looks believable and professional:
1. Match the Lighting
Choose a sky with the same light direction as your original shot.
2. Use High-Quality Sky Images
Avoid pixelation by using high-resolution images or video backgrounds.
3. Watch for Reflections and Shadows
If your video has water, windows, or reflective surfaces, adjust them accordingly.
4. Keep it Subtle
Don’t overdo color grading — natural transitions work best.
Download
Download
Creative Sky Replacement Ideas
Not sure what type of sky to use? Here are some fun ideas:
-
Golden Hour: Create that cinematic sunset vibe.
-
Night Sky: Add stars, moonlight, or northern lights.
-
Stormy Clouds: Add drama or a suspenseful atmosphere.
-
Fantasy Skies: Use nebula skies, alien planets, or auroras for creative projects.
-
Seasonal Skies: Reflect seasons like clear summer skies or snowy overcast ones.
Who Should Use This?
Kotion Ninja’s sky replacement feature is perfect for:
-
YouTubers and Vloggers
-
Travel videographers
-
Wedding and event editors
-
Short film creators
-
Instagram & TikTok content creators
-
Small businesses and marketers