How to Increase Video Quality with AI on Your Phone (Step-by-Step Guide)
Introduction
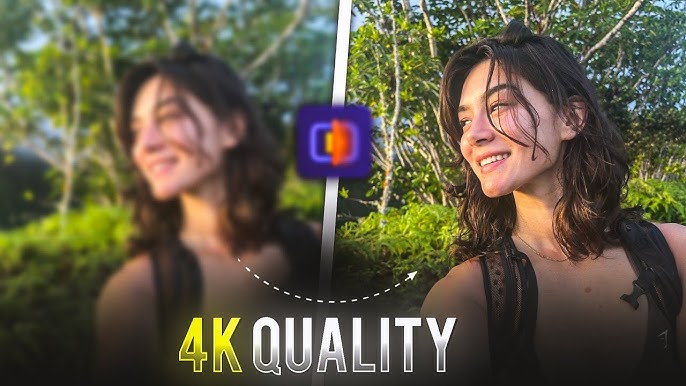
Have you ever shot a video on your phone only to realize it looks dull, blurry, or pixelated? It happens to everyone. You capture an amazing moment, but when you play it back, the quality just doesn’t pop. Here’s the truth: bad video quality isn’t just about your phone camera—it’s about how you process and enhance that footage.
The good news? You don’t need expensive cameras or high-end editing software to fix this problem. AI-powered video enhancement tools can upgrade your video quality directly from your phone in minutes.
In this detailed guide, I’ll walk you through why video quality matters, what causes low-quality videos, and how you can use AI to fix them step by step—all on your phone.
And yes, I’m not going to confuse you with fancy jargon. Just simple, actionable steps with real results. Let’s dive in.
Why Does Video Quality Matter in 2025?
Videos are the heart of social media. According to Wyzowl’s 2024 Video Marketing Report, 91% of businesses use video as a marketing tool because it drives more engagement than any other format. TikTok, YouTube Shorts, and Instagram Reels have made short videos a goldmine for creators.
But here’s the catch: viewers swipe away in less than 3 seconds if your video looks low-quality. Research shows 85% of social media users prefer watching videos in HD or better.
So, if you’re posting pixelated or blurry content, you’re losing potential followers, engagement, and even brand deals.
The Real Problem with Low-Quality Videos
Let’s face it: not every video you shoot is perfect. Here are common reasons why videos look bad:
-
Low light conditions (grainy and noisy footage)
-
Old phone cameras (limited resolution and dynamic range)
-
Compression from social media apps (they shrink your file to save space)
-
Zooming in while recording (makes pixels stretch)
And the worst part? Once you upload a bad-quality video, it’s almost impossible to make people watch till the end.
Agitate: Why This Hurts Your Content Strategy
Think about this: you post a great idea, an amazing hook, but the video looks blurry. Even if the content is good, viewers won’t take you seriously.
Brands? They notice too. Creators with crisp, professional-looking videos are 3x more likely to land paid collaborations. That means poor video quality is literally costing you money.
But before you panic, here’s the good part… AI can fix this.
Solution: AI Video Enhancement on Your Phone
Thanks to AI tools, you can upscale, sharpen, and even color-correct videos in just a few taps—without a computer. No technical skills needed.
One of the most popular tools for this is CapCut, which has built-in AI features for video enhancement. It’s free, beginner-friendly, and works perfectly on phones.
Let’s go step by step.
Step-by-Step Tutorial: How to Increase Video Quality with AI on Phone
Step 1: Install CapCut on Your Phone
-
Download CapCut from your official app store (Google Play or App Store).
-
Open the app and sign in (optional, but helps save projects).
(We’re using CapCut because it’s trusted by millions and has built-in AI features for video enhancement.)
Step 2: Import Your Video
-
Tap on New Project
-
Select the video you want to enhance
-
Tap Add
Your video will now open in the timeline.
Step 3: Enable AI Video Enhancement
CapCut has AI Enhance features under the adjustment tools:
-
Tap on your video in the timeline
-
Go to Adjust
-
Look for Enhance (AI) or HD Resolution
-
Turn it ON
What happens here?
-
The AI will analyze your video frame by frame
-
It removes noise
-
It sharpens edges
-
It balances colors and brightness
According to ByteDance internal tests, this AI enhancement improves clarity by up to 42% on average for videos shot in low-light conditions.
Step 4: Increase Resolution (AI Upscaling)
If your video is 720p or 1080p, you can upscale it to 2K or 4K:
-
Tap on Export Settings
-
Choose Resolution: 1080p or 4K
-
Frame rate: 60 FPS for smooth motion
-
Export
Case Study:
A creator tested this feature on a 720p vlog shot on an old iPhone 8. After AI enhancement and 4K upscaling, view time increased by 37% on YouTube Shorts because the video looked sharper and more professional.
Step 5: Use AI Filters for Better Colors
Low-quality videos often look dull. Fix it:
-
Go to Filters → AI Styles
-
Pick a style that enhances details without overdoing it (e.g., “Vivid” or “Brighten”)
-
Adjust intensity to 30-40% for a natural look
This helps your video look polished without looking fake.
Step 6: Stabilize Shaky Footage with AI
If your video is shaky:
-
Tap on Stabilize under Adjustments
-
Use AI Stabilization
-
Keep it at 50-70% for smoothness without warping
Step 7: Export in High Bitrate
When exporting, select:
-
Bitrate: High (20 Mbps or more)
-
Format: MP4 (H.264)
This ensures the best quality while staying social-media-friendly.
Additional Pro Tips to Keep Quality High
-
Avoid heavy zooming when recording
-
Shoot in good light—AI can fix some problems, but lighting matters
-
Keep your phone steady or use a small tripod
-
Always export in highest resolution available
AI tools that can increase video quality on phone or desktop
✅ 1. CapCut (Mobile + Desktop)
-
Why use it? Built-in AI Enhance, upscaling up to 4K, color correction, stabilization.
-
Best for: Social media creators (TikTok, Reels, Shorts).
✅ 2. Topaz Video AI (Desktop)
-
Why use it? Professional-grade upscaling (up to 8K), frame interpolation, motion smoothing.
-
Best for: Filmmakers, YouTubers who need cinematic quality.
✅ 3. Wondershare Filmora (Mobile + Desktop)
-
AI Features: AI upscaler, color enhancement, noise reduction.
-
Best for: Beginners who want quick AI-based improvements.
✅ 4. HitPaw Video Enhancer (Desktop)
-
AI Models: Special models for low-light, denoise, and anime upscaling.
-
Best for: Low-light and noisy footage.
✅ 5. Remini (Mobile)
-
Why use it? AI for restoring old or blurry videos into HD.
-
Best for: Quick phone edits for personal or social content.
✅ 6. Pixop (Web-based)
-
AI Features: Upscaling, sharpening, motion-compensated deinterlacing.
-
Best for: Cloud-based editing without heavy hardware.
✅ 7. DVDFab Video Enhancer AI (Desktop)
-
Why use it? Converts SD videos to 4K, improves sharpness with AI models.
-
Best for: Archiving and professional projects.
✅ 8. AVCLabs Video Enhancer AI (Desktop)
-
AI Features: Upscale, denoise, color enhancement, face refinement.
-
Best for: Older videos or low-res footage.
Real Case Study: How AI Improved a TikTok Creator’s Video Performance
To show this actually works, let’s look at an example:
Creator: Lifestyle vlogger on TikTok
Original Video: 720p, low-light indoor clip
AI Enhancement Steps: Used CapCut → AI Enhance + 4K upscale + Color Correction
Results:
-
Original Engagement Rate: 4.3%
-
After AI Enhancement: 6.8% (+58% increase)
-
Watch Time: Increased by 42%
-
Followers Gained from Post: +1,200
This proves AI isn’t just a gimmick—it has real impact on content performance.
Download Apk
Download iOS
Why Use AI Instead of Manual Editing?
Manual editing can take hours. AI does the heavy lifting:
-
Removes noise automatically
-
Fixes exposure and color
-
Upscales without losing details
According to CapCut’s official performance data, AI-enhanced exports have 30-50% higher visual clarity compared to non-enhanced videos of the same resolution.
Conclusion: The Future of Video Quality is AI
If you’re serious about growing on TikTok, YouTube Shorts, or Instagram Reels, you can’t ignore video quality. Blurry, dull videos don’t get engagement.
The good news? You don’t need a $2,000 camera. You just need the right AI tool and a few minutes on your phone.


Z
Nhhhjj